An(other) Arduino-Based Line-Follower Robot

29 10 2010

After more than half a year from the MadridBot competition, I’ve decided to rescue the documentation and pictures of the robot that we built for a line-following (speed) competition.

It’s basically a 1:28 scale RC car hacked with a servo for direction and an home-made arduino based board. In the front there can be seen 5 x CNY70 line sensors (IR reflection), shielded from light and crashes with foam. The rest of the car is described in the pdf below.

Lee el resto de esta entrada »


New section of my blog: Tinkering Today!

15 09 2010

Los vídeos de Vodpod ya no están disponibles.

Tinkering Today, posted with vodpod


Any blogger will agree with me: There are a LOT of situations in which you think about writing a new post and, after some time, you realize that the article is not interesting enough to finally publish it. This happens to me everyday, and yesterday I reached the conclusion that I had to create a place to keep all this «small projects» together, and share them with the world (Ok, the vast majority of them are unlikely to be interesting, but this is better than leaving them unpublished)

With this in mind, yesterday I re-opened my Flickr account and I created a new set called «Tinkering Today…» in which I will try to upload one picture a day summarizing what I’ve spent my time in. So this is going to be quite strange because this Flickr set is more similar to a blog than this site, which I will keep for publishing finished projects. You can find the latest updates at the right of this page or the full set in the «Tinkering Today…» page of the blog.


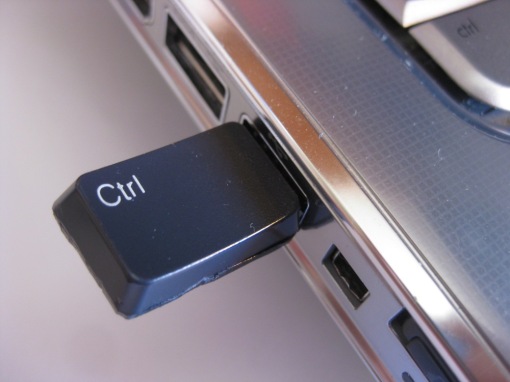
Ctrl key Pendrive: What to do with a broken Keyboard

14 07 2010

This morning I was trying to tidy up my workbench when I found an old PS2 keyboard that I was keeping for disassembly. After removing some screws I realized that, as usual, the electronics of the keyboard were substituted by a black blob of epoxi, so few things apart from some connectors and some meters of AWG26 cable could be savaged.

But then I remembered that I had a tiny USB broken pendrive with a metal enclosure. I opened it and found that the only problem with it was that the crystal was desoldered, something quite easy to fix.

After that, the only remaining thing to do was to find a new enclosure for the pendrive, so I took a Ctrl key from the keyboard, hollowed it and cut it in a shape that could allow the «naked» pendrive to fit in it. In the bottom part it is covered with a piece of plastic from a VHS tape box.

Lee el resto de esta entrada »


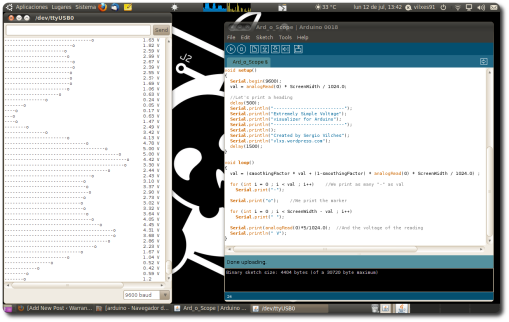
Ard_O_Scope: An Extremely Simple Voltage Visualizer (oscilloscope) for Arduino

12 07 2010


While I was investigating some noise-filtering and smoothing algorithms for analogRead in Arduino, I realized that I needed some way to test the influence of some parameters over a certain signal. I usually do this just by sending the reading of a potentiometer through the serial port of the Arduino and see how these number changed while sweeping my potentiometer.

But this is not a very graphical way to see a signal, so I wanted something similar to an oscilloscope, to to see the data I was pushing through the serial port in a comfortable way. So with only some lines of code I have created a nice arduino voltage visualizer, in the Old School way: It just prints to the Arduino serial console a real time bar chart with the readings of your input, with a refresh frequency of about 350 samples per second (When using 115200 bauds). No comparison with an oscilloscope, but useful when measuring inputs from potentiometers or LDRs…

Watch it in action after the break!

Lee el resto de esta entrada »


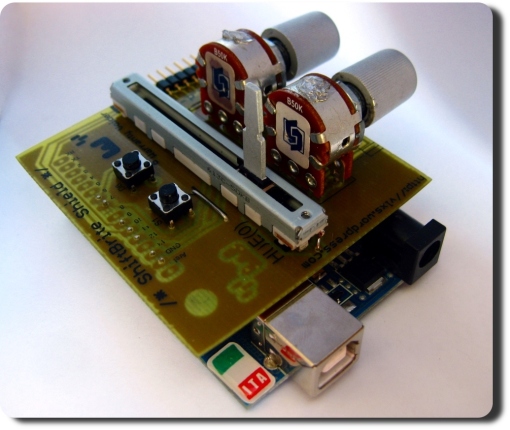
ShiftBrite Shield – A color mixer for Arduino

8 07 2010

LEDs… The beauty of electronics, the soul of a project. What can I say, I love LEDs!! Each time I see a project involving RGB LEDs, several ideas come to my mind and I’ve always wondered I had a good hardware platform to mess around with them!

Lee el resto de esta entrada »


Present from the sky

7 06 2010

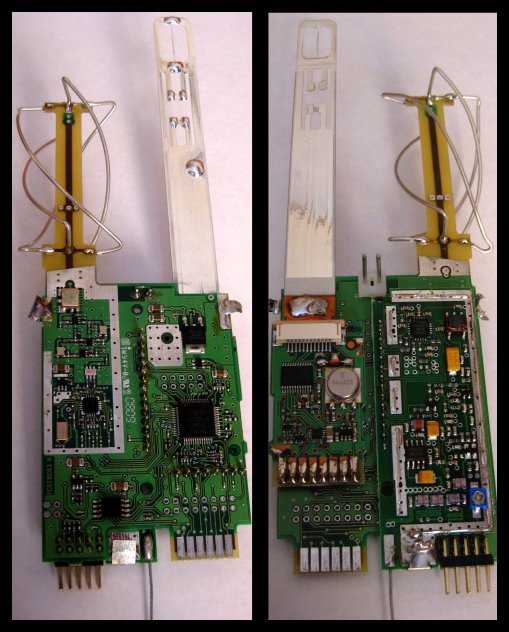
Some days ago, I received a very weird and exciting SMS from a friend asking me if I wanted the pieces from a «meteorological balloon». The only words that came to my mind were «What the hell!!??», so I took my bike and cycled quickly to my friend’s home.

Lee el resto de esta entrada »


Full-mess

27 02 2010

Esta tarde me he dado cuenta de lo que es la ingeniería inversa… Muchos cables, mucha paciencia, y olor a silicio quemado.

Un grupo de colegas estamos desarrollando un robot velocista (siguelíneas) para presentar a varias competiciones de robótica. Como base estoy utilizando un pequeño coche RC que tenía cogiendo polvo desde hace 4 años, y que ahora estoy intentando que responda a las ordenes de mi Arduino. Eso lleva un proceso bastante complicado, que va desde meter osciloscopio y voltímetro en la electrónica del coche para ver cómo controlar motores y dirección, aislar los componentes necesarios para su funcionamiento, emular el resto con el Arduino, y luego… quemarlos al conectarlos a un voltaje no muy adecuado (hice hervir un FET al conectarlo a 9V en vez de 6).

Lo que se ve en la imágen es el Arduino con mi LCD shield enviando una señal PWM para controlar la velocidad del motor del coche (el cual está conectado a través de un transistor de 3 amperios). Esta señal se vigila con el osciloscopio, y mientras el polímetro me asegura que no está pasando demasiada corriente por el transistor o motor.

Vamos, que hacer bién las cosas cuesta su trabajo, pero al final arroja resultados.


SOIC to DIL8 Breakout board

14 02 2010

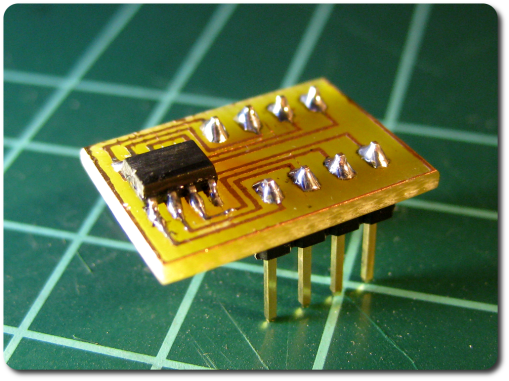
En el desarrollo de nuestro robot siguelíneas FET_0x08 nos hemos visto obligados a reutilizar componentes SMD de la electrónica del coche RC que estamos usando como base. Para hacer pruebas, no hay nada más cómodo que usar una breadboard, así que he creado esta pequeña PCB para poder usar componentes SOIC8 de 3.8mm de ancho como si fuesen integrados normales (DIP).

Imágen de la PCB y fichero Eagle tras la pausa.

Lee el resto de esta entrada »


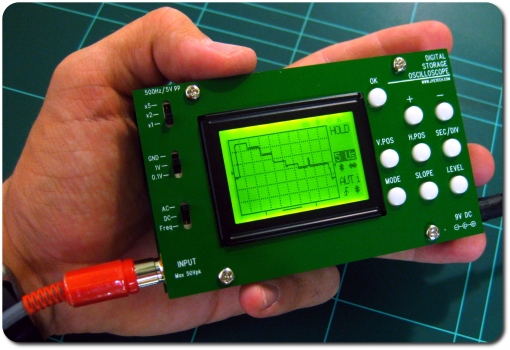
Feel the power in your hands: Jyetech Digital Storage Oscilloscope

13 02 2010

Señal de vídeo compuesto (TV)

El osciloscopio: el mejor amigo del ingeniero. Tarde o temprano, todo electrónico que se precie tiene que conseguir uno de estos cacharros, y yo no iba a ser menos…
Desde que comencé a manejar estos aparatos en el instituto, siempre he tenido ganas de comprar uno, pero normalmete, problemas de espacio y presupuesto me lo impedían. Hasta que vi esta maravilla en internet: El osciloscopio de almacenamiento digital de Jyetech.
Es un pequeño osciloscopio con pantalla LCD, bajo coste (unos 40€) y que se puede comprar en kit.

Lee el resto de esta entrada »


El poder del «Made in China»

13 02 2010

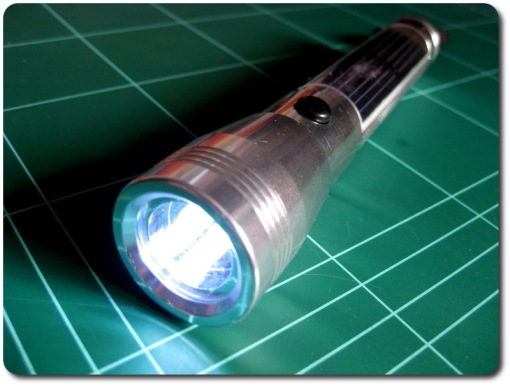
Linterna LED Solar: 1€

Con esto me he encontrado hoy en el hipermercado de turno (Alcampo), y no he podido resistir a la tentación. Lo que no sabía era la cantidad de piezas que iba a poder obtener de ella…

Lee el resto de esta entrada »